http://www.ewon.us/us/Support/software-download.html
With your PC still connected to the Internet, let's ensure eBuddy has all the latest firmware packages available for your eWON. After installing and running the application, you should see the following screen. You may need to toggle View-Wizard View to see the layout below.
After selecting "Update eBuddy" above and selecting "Internet" as the source for updates, you arrive at the following screen. Here you select which eWON products and languages to download updates for. I recommend selecting the specific product of interest (Example: eWON 4005CD) and selecting your language of choice. Hit "Next >>" to complete the eBuddy update process.
Next, after connecting your PC to one of the eWON's LAN ports, you select "Set IP Address." Rather than typing in the requested serial number you can simply hit "Browse" and eBuddy will list any locally connected eWONs. Selecting "OK" here will populate the serial number onto the previous page.
After filling in the device defaults "adm" username and "adm" password, you will reach this next screen where you configure the desired LAN IP of the eWON. This address should be an available address in the same subnet of the PLC or other Ethernet device you intend to connect to remotely. Example: if your PLC is 192.168.3.10 255.255.255.0, and 192.168.3.254 is currently unused, you assign that address to the eWON here.
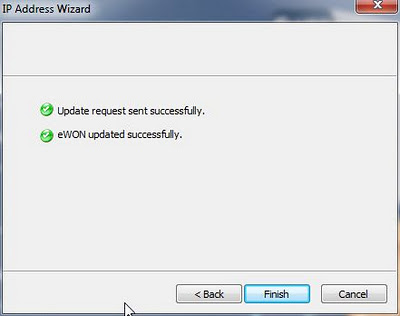
You will see that the "Update request sent successfully" followed soon after with "eWON updated successfully."
You may also use the above step to assign a temporary address to the eWON for the purposes of upgrading firmware as this step requires the eWON LAN IP to be in the same subnet as the eBuddy PC. After completing the required addressing, you select "Update Firmware" at the eBuddy homepage. Using the same "Browse" function as before, select your eWON and hit "OK." You'll then see this screen which confirms the current firmware running on the eWON and allows you to select which firmware to use for update. Hit "Next > >" and again you will see visual confirmation of the update request and eventual update success.
With everything updated, let's continue by configuring your eWON for Internet access. Select the appropriate link below.
Related Posts
- eWON Config Post 2a: Configure eWON Internet Access (Hardwired)
- eWON Config Post 2b: Configure eWON Internet Access (Cellular)
- eWON Config Post 3: Configure eWON Connection to Talk2M
- eWON Config Post 4: Connect to eWON and Remote Devices using eCatcher
- Remote Access Simplified with eWON and Talk2M
Links of Interest


